
But for writers, I think it’s very important to go outside it on a regular basis. For one thing, your characters are going to be outside their comfort zones, being challenged, tested, thwarted, more often than not, because one thing about comfort zones is that they can be pretty darn boring to read about. Who wants a character for which everything goes right? (This is, I will argue, why the Richie Rich comic books were pretty darn bland.) How can you write a character outside their comfort zone if you don’t know what it’s like?
And outside our comfort zone is where we learn new things, new skills, new things about ourselves. Here in Costa Rica, my Spanish skill is leaping upward in a way it wouldn’t at home, despite all my best resolutions about daily Duolingo workouts or buying books in Spanish from Amazon. And that in turn has prodded me to try some new things with it, like using one of my stories as a practice piece in translation.
This is why, when I talk to students about going into a workshop like Clarion West or Viable Paradise, I urge them to try to fail. Because you learn so much more from a story where you tried something new and failed than one where you did the same thing you always did. I wrote Zeppelin Follies while at Clarion West as my very first try at a screwball comedy, and I will confess that the first draft was a horrible mishmash of stuff. And boy did I learn a lot from that.
Fortunately, for the vast majority of writers, we like new things. New words, new vistas, new thoughts. And we find them outside that comfort zone, in a place that is frightening and exhilarating all at once. Whizzing along a zipline, diving into waters over our head, talking to strangers. If you doubt that you are brave enough to do such things, remember that you do something braver everyday by putting your writing out there for other people to look at.
Enjoy this writing advice and want more content like it? Check out the classes Cat gives via the Rambo Academy for Wayward Writers, which offers both on-demand and live online writing classes for fantasy and science fiction writers from Cat and other authors, including Ann Leckie, Seanan McGuire, Fran Wilde and other talents! All classes include three free slots.
Prefer to opt for weekly interaction, advice, opportunities to ask questions, and access to the Chez Rambo Discord community and critique group? Check out Cat’s Patreon. Or sample her writing here.
...


What you need:
Step 1: Assemble What You Have
Assemble the glassware you’ll be using. I suggest checking cupboards first. You’ll want several sizes that can be layered on top of each other, and (usually, depending on your other pieces) something for the center, like a short candlestick, round glass ball, or other object suitable for a focal point.
Go through your crafting supplies and look for beads, bits of jewelry, beach glass, shells, and other pieces that can be used to decorate layers.
Look at what some people have done to get ideas.
Step 2: Find What You Don’t Have
If you can’t find everything you need at home, go shopping. In the thrift store, look for interesting pieces that are chipped or otherwise deeply discounted in both the ceramics and glassware sections. Check the metalware and mirrors as well. My local Value Village has a wall in which they bag oddments and sell as lots. If you have this, browse through it. Things you’re looking for: glass pebbles, large beads, holiday ornaments, mosaic pieces, and other things that can be glued onto plates. Pick up old shot glasses or small bottles to use for the backs.
...


I’d gotten the idea from seeing them on Pinterest. I did do some picking through thrift stores to find odd bits of china, but also used some pieces I’d gathered over the years. It seemed like a nice way to carry out the decluttering mission, but preserve some of those memories. I augmented some pieces with glass or metallic spray paint and glued on glass pebbles, marbles, and other odd bits. The fixative for all of this is Marine Goop, which you can find on Amazon.
If I had more workspace, I might employ the Dremel in some of this, by drilling holes in things and then using a screw and bolt to hold the constructions together. However, the glue is marine fixative that is super strong and waterproof. I’m going over to Mom’s tomorrow to get some of the flowers set up and that will be the first test.
Tips for creating glass/china garden flowers:
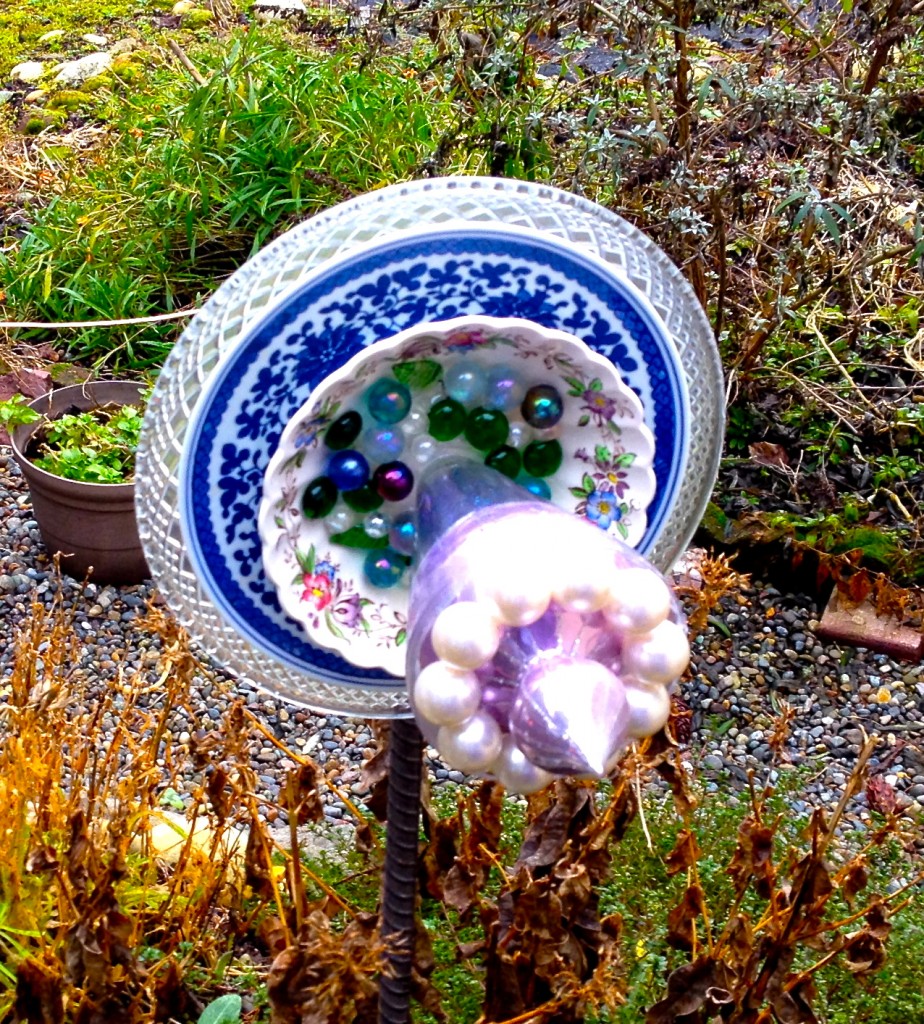
The Pinterest versions suggested gluing bottles to the back, but that seemed very large to me given the size of the flowers. Instead I used tall shot glasses, which run fifty cents each at our local Goodwill. The mounts are lengths of rebar capped with a padded top made of terrycloth from a cut-up towel and duct tape.
As a writer, I think it’s important to be creative in other ways. I cook, I garden, and sometimes I make things. Usually I give those things away because otherwise I would drown in objects. The flowers were a fun way to exercise that urge to make, and somewhere down the line I’ll be doing flash stories to go with each one. In the meantime, I’ve written the titles for those already.
I’ll go through the individual ones in posts. Here’s the first.

I think this ornament is a reasonable example of preserving memories. The ice cream glass is part of a set acquired several decades ago. I have a poem about willow ware, so I like using it. The glass charms are part of a hanging ornament that I received several years ago, and I’ve had the marbles since high school.

...
Want access to a lively community of writers and readers, free writing classes, co-working sessions, special speakers, weekly writing games, random pictures and MORE for as little as $2? Check out Cat’s Patreon campaign.

"(On the writing F&SF workshop) Wanted to crow and say thanks: the first story I wrote after taking your class was my very first sale. Coincidence? nah….thanks so much."

(horror, short story) I glance in the glass wall’s reflection. It faces me twenty feet away as I walk up the stairs, marble slab steps showing grainy pink underneath my red sneakers. My fingers clutch the railing’s chrome. I’m feeling shaky, that internal quiver where your body announces that it may not be up to this. I focus on my image. Is my hair longer now? The eyes wider, bluer? The lips, are they swinging towards bee-stung or thinning?


This site is protected by reCAPTCHA and the Google Privacy Policy and Terms of Service apply. This site is a participant in the Amazon Services LLC Associates Program, an affiliate advertising program designed to provide a means for sites to earn advertising fees by advertising and linking to Amazon.com.