Other wonderful things in the offering include Tobias Buckell’s novels Crystal Rain, Ragamuffin, and Sly Mongoose, three additional stories from the anthology in which Surrogates originally appeared, Clockwork Phoenix 3, and work by Terry Brooks, David Anthony Durham, Nancy Holder, Katherine Kerr, Mary Robinette Kowal, Ellen Kushner, Jay Lake, Naomi Novik, Sherwood Smith, and Tad Williams, as well as much more. It’s very worth checking out if you’d like to load up your e-reader with a virtual armload for free.
Want access to a lively community of writers and readers, free writing classes, co-working sessions, special speakers, weekly writing games, random pictures and MORE for as little as $2? Check out Cat’s Patreon campaign.
Want to get some new fiction? Support my Patreon campaign.
"(On the writing F&SF workshop) Wanted to crow and say thanks: the first story I wrote after taking your class was my very first sale. Coincidence? nah….thanks so much."
~K. Richardson
You may also like...
First Editing Class: Notes and Observations
The cats remain fascinated by the classes. They can't figure out who I'm talking to.The Editing class is split into three sections. In this first session, we focused on developmental, or “big picture,” editing.
Some people are taking the class in order to edit their own stuff, others to edit for other folks, a couple for a combination of that. We talked about what a developmental edit is intended to do, and how it’s different from a copy-edit. In fact, you want to avoid copy-editing (other than a couple of cases which I’ll get to in a minute) because often that sentence you’re tinkering with will end up discarded or substantially revised in the final version.
Honing your editing ability to where you can trust it is one way to free yourself up when writing. Instead of listening to the internal editor telling you that sentence isn’t perfect or that you need to check that name on Wikipedia before using it, you can assure that editor it will get its chance during the revision process and go on writing.
Developing a process also helps you know when to stop rewriting. I work from the big picture stuff in, moving to small sentence level details in a second or third draft. Usually my process goes like this:
Bang out a first draft. It may have parenthetical directions like (expand on this) or (transition here) or (describe), but it is a complete story.
(Optional but encouraged) Let it sit for a week or two. This is where procrastination can really bite you in the ass.
Print out the draft and write all over it. This is my developmental edit, in which structures may get changes, sections moved (or eliminated), point of view or tense changed, etc. It’s also where all those parenthetical directions get fulfilled.
Entering these changes onto the computer may involve some more tinkering as I do so, but generally I’m working towards another draft that I can print out.
That draft gets printed out and edited again. This stage is where I read aloud and tinker at the sentence and paragraph level. I may changes names at this point, and I’ll do things like look for adverbs (as discussed in The 10% Solution).
I will probably do another read aloud pass after that’s entered into the computer, depending on how hard a deadline is pressing.
More on developmental editing, what it is, how I do it, and how one needs to adapt editing to genres such as hard SF, dark fantasy, horror, etc, in another post.
Unwritten Creativity: Glass Garden Flowers For Mom
How to make the mounts for these recycled glass flowers is a detail that most of the Pinterest pins don't seem to answer. I used a tall shot glass, affixed with marine adhesive. I didn't want a short shot glass because it seemed to me those would be tippier.One of Mom’s presents this year was a set of garden flowers made from odd plates and dishes. These were a lot of fun to assemble, and I want to, over the course of the next few months, make a set that goes across the problematically shady front section of her house. Combined with the tulips and irises, that should fill things out and add both color and a touch of individuality.
I’d gotten the idea from seeing them on Pinterest. I did do some picking through thrift stores to find odd bits of china, but also used some pieces I’d gathered over the years. It seemed like a nice way to carry out the decluttering mission, but preserve some of those memories. I augmented some pieces with glass or metallic spray paint and glued on glass pebbles, marbles, and other odd bits. The fixative for all of this is Marine Goop, which you can find on Amazon.
If I had more workspace, I might employ the Dremel in some of this, by drilling holes in things and then using a screw and bolt to hold the constructions together. However, the glue is marine fixative that is super strong and waterproof. I’m going over to Mom’s tomorrow to get some of the flowers set up and that will be the first test.
Tips for creating glass/china garden flowers:
Glue in stages and let them dry completely. Gluing the shot glass (or bottle) on the back will probably be the last thing you do. I used plastic containers to hold the flowers upside while the shotglass set.
Give yourself plenty of time. That glass paint is supposed to dry for four days before you set it by baking it. I may have shortened that a bit in my rush and it remains to be seen what the result is.
Don’t be afraid to adorn. I glued on glass charms and pebbles, gold candy paper, pearl beads, and a cat toy.
Keep it on the cheap by a) seeing what you have already in cupboards and crafting supply boxes that can be sued, b) checking when thrift stores have their china and glassware on sale, and c) looking for chipped items that are discounted further.
Don’t just look at china and glassware. I used chipped Christmas ornaments, a ceramic garden pot spray-painted copper, and a metal serving plate. Next time I’m thrifting I’ll look for round mirrors as well. One great example I saw used old knives arranged like spikes around the outer edge.
The Pinterest versions suggested gluing bottles to the back, but that seemed very large to me given the size of the flowers. Instead I used tall shot glasses, which run fifty cents each at our local Goodwill. The mounts are lengths of rebar capped with a padded top made of terrycloth from a cut-up towel and duct tape.
As a writer, I think it’s important to be creative in other ways. I cook, I garden, and sometimes I make things. Usually I give those things away because otherwise I would drown in objects. The flowers were a fun way to exercise that urge to make, and somewhere down the line I’ll be doing flash stories to go with each one. In the meantime, I’ve written the titles for those already.
I’ll go through the individual ones in posts. Here’s the first.
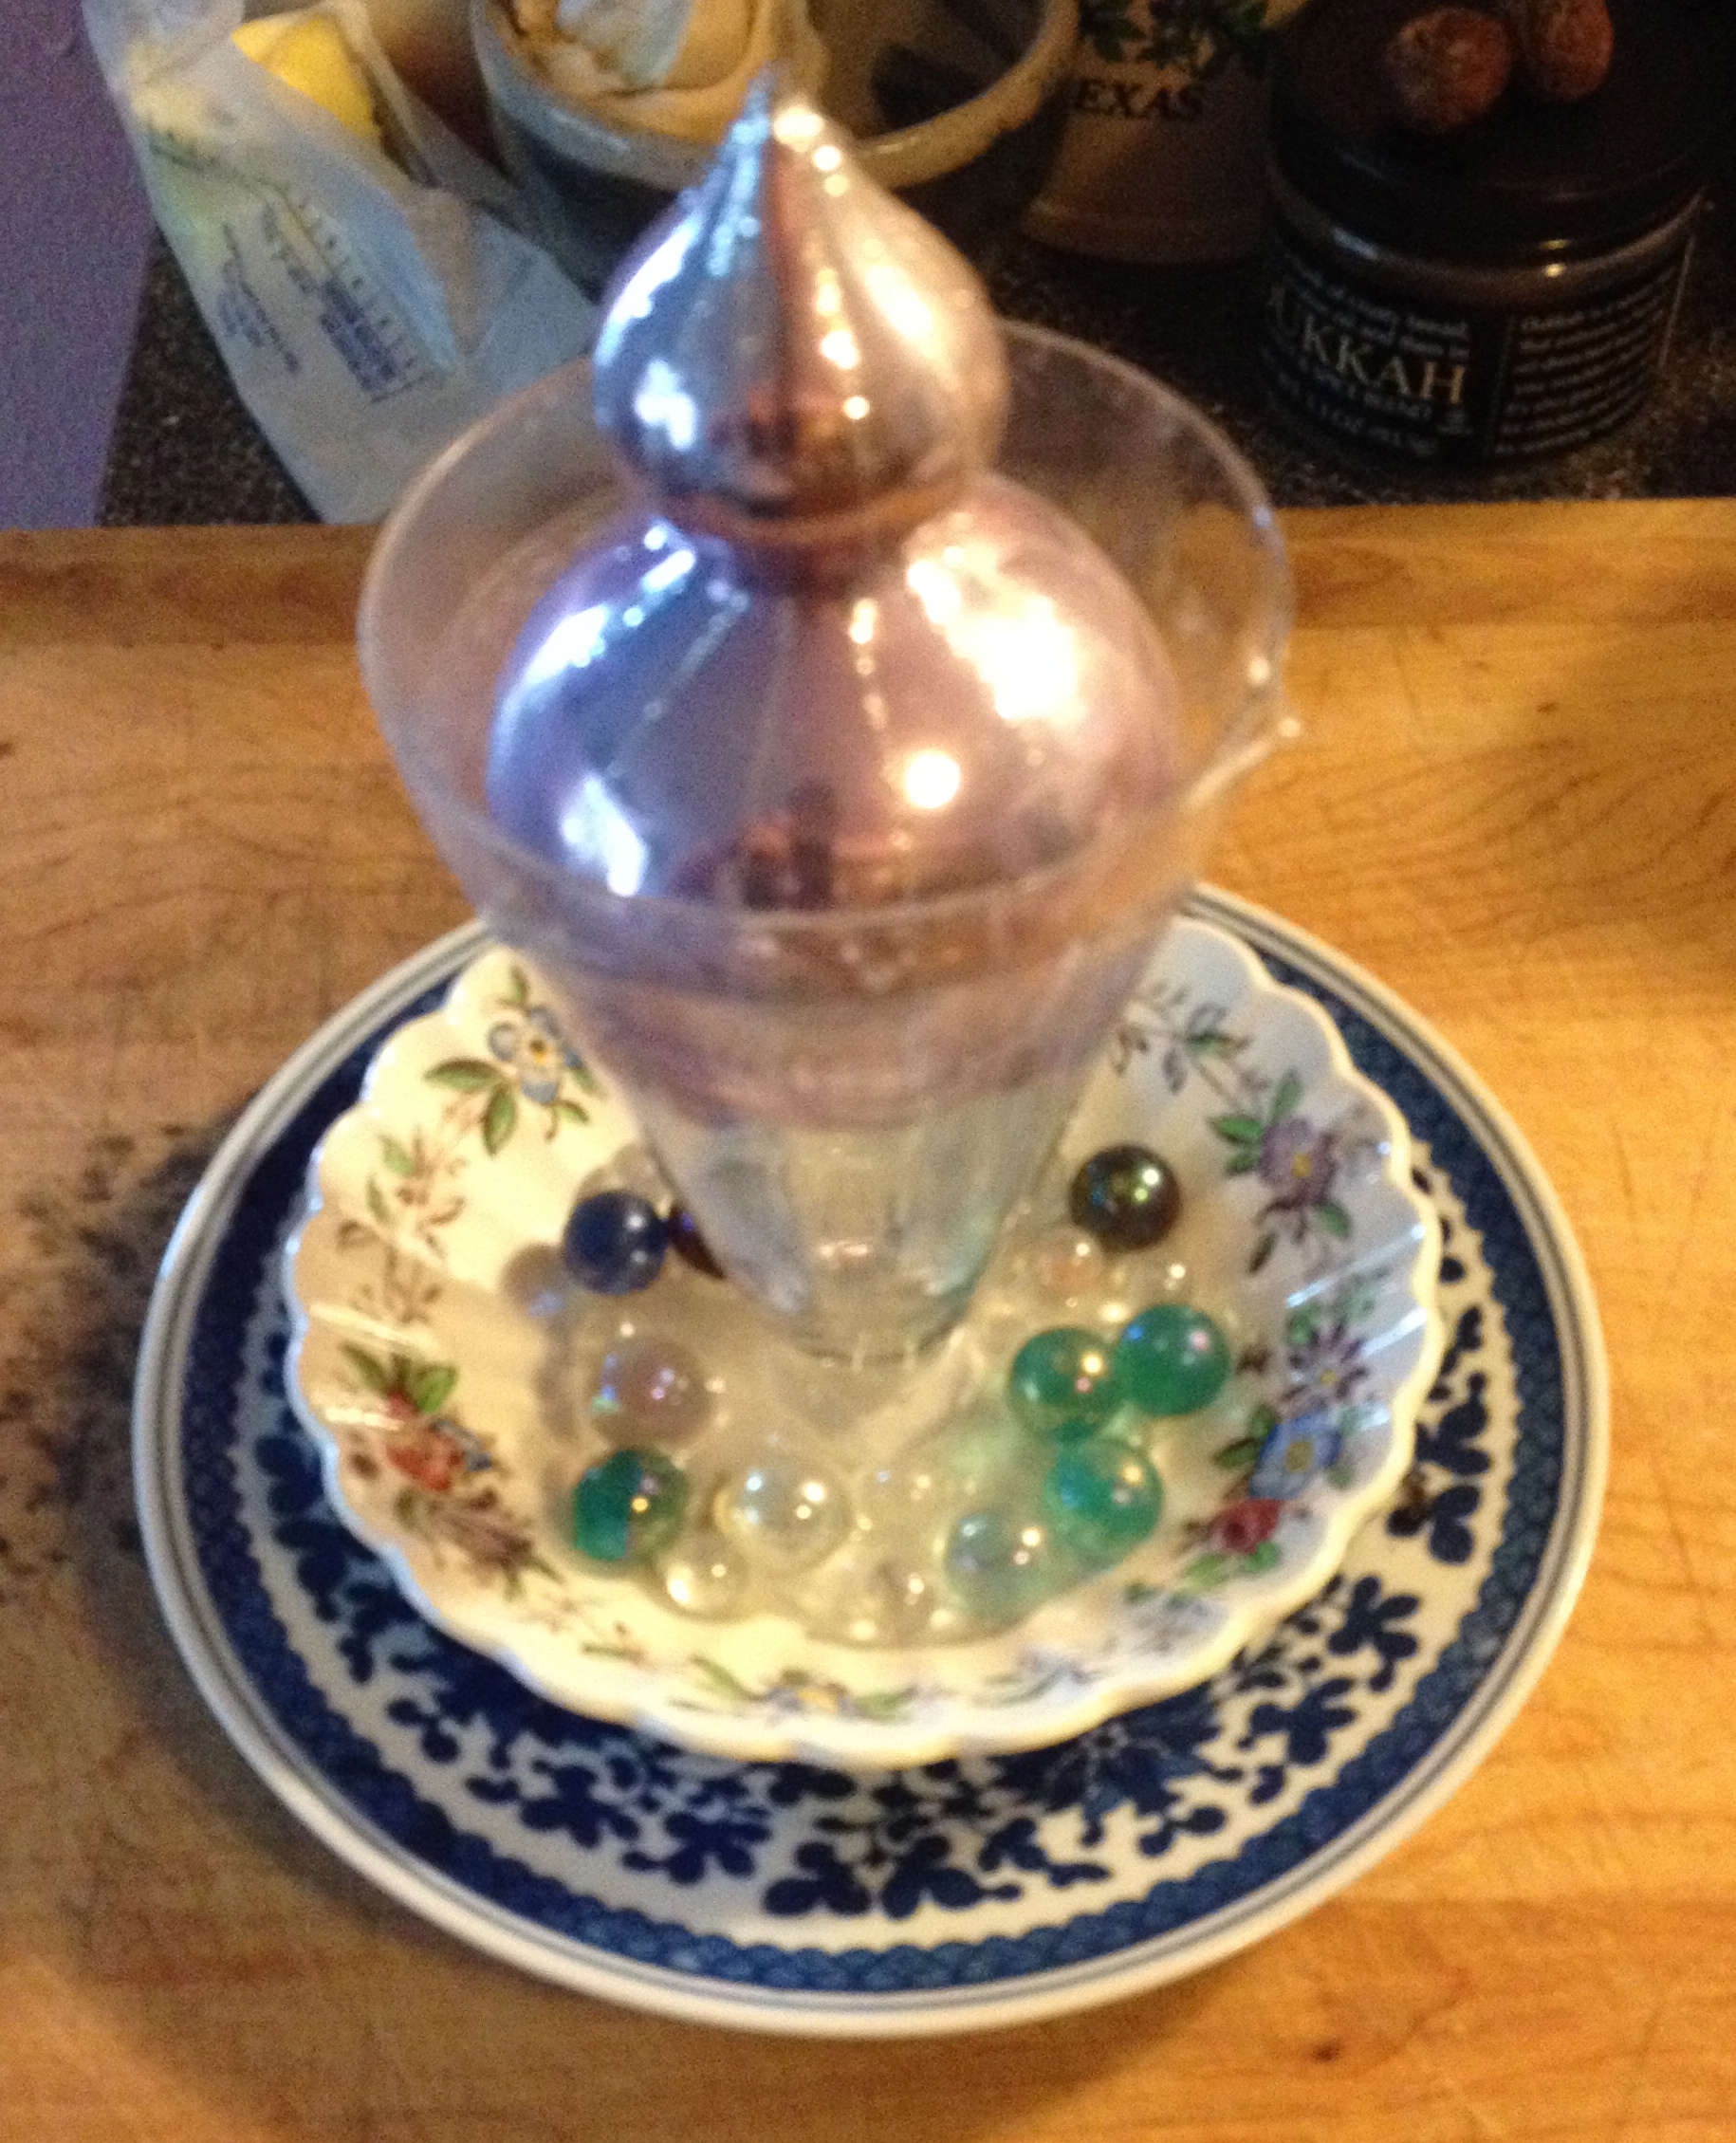
This is "Snow Queen." Layers, back to front, are: a cut glass plate, willow ware plate, floral saucer with glass marbles and beads, vintage ice ice cream glass, a Christmas ornament, large pearl beads.
I think this ornament is a reasonable example of preserving memories. The ice cream glass is part of a set acquired several decades ago. I have a poem about willow ware, so I like using it. The glass charms are part of a hanging ornament that I received several years ago, and I’ve had the marbles since high school.
The pearl beads evident in the "in the wild" shot are lacking here. One important step in making these is, once you've finished, eyeball them and see how happy you are with the result. I wanted another echo of the elegance implicit in the ornament's shape, so I found the beads in digging through my craft box and incorporated them. There are also opalescent beads trapped in the glass beneath the ornament.